
DIY Pumpkins
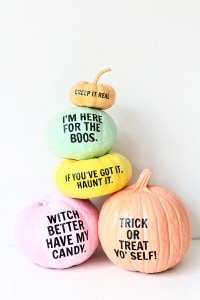
Photo by Jeff Mindell | Studio DIY (check their website for more great photos!)
I’m not sure when I got all into the whole DIY craze, but I have and it’s time to embrace it.
Recently, I ran across this DIY Pun-kins post from Studio DIY and I decided to give it a go for myself. (If you’ve never checked out Studio DIY, do yourself a favor and do it now.)
I invited my friend Braidee over and we drank wine and got our painting party on. Truth be told, I’m not very artsy but she definitely is.
Below are the instructions from Studio DIY and in italics are my changes to them:
1. Paint your pumpkins whatever color you’d like! I recommend doing a white “primer” layer first and then adding the color. I skipped this step, mostly because I’m not patient enough to wait for the primer to dry. In hindsight, I should have listened.
2. Download and print the puns (which are mirrored on purpose!) onto tattoo paper according to package instructions (all tattoo paper is different). I used black stick on letters, which worked surprisingly well. There probably is something I could have painted over them to make them stick better, but they worked pretty easily.
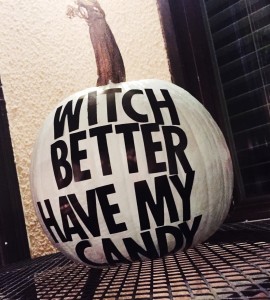
Here was my personal DIY crack at it…
3. You’ll follow all the same directions to apply the tattoo to the pumpkin, just as if you were applying it to your skin! For ours, once the ink dried, we had to press the clear adhesive sheet on top of the printable and then I cut each pun out separately. Skipped.
4. Have a wet rag/paper towel ready but DO NOT get the tattoo wet until it’s on the pumpkin. Peel the clear sheet off, leaving the adhesive behind and place the tattoo where desired and rub with the wet cloth for 10-15 seconds. Carefully peel the paper off, leaving your tattoo behind! For the larger puns or if you’re pumpkin is super round, you can work in sections or cut the words of the tattoo apart and do one at a time. Skipped.
Voila – to the right is my little creation – what do you think?
I also found these Rice Krispies Treats w/ Oreos recipe from Studio DIY. Be sure to follow The Blonde Side on Pinterest as well for more recipes and DIY projects!
Part of my goal for moving into the Millennium Kirby was to have more friends over and host things that don’t necessarily require going out to a bar or spending a ton of money so fun DIY nights like this make it possible! [SPONSORED]


Leave a Reply
Want to join the discussion?Feel free to contribute!