Maya Brenner State Series Notecards (photo: Sunshine Winters Photography)
In my world, thank you notes are a given, but any handwritten note is just a signal of someone else taking time to say hello, that they were thinking of you.
I’m a big fan of handwritten notes – even if it says nothing but “hello, I miss you!”
I’m a believer that a cute set of stationary, a good writing pen, and a warm cup of coffee can really set the tone for sending handwritten notes. I usually plop down at my coffee table, with my dogs by my side (usually bothering me) and an inspirational coffee mug filled to the brim.
I typically spend about 20 – 3o minutes writing out letters to my friends, my family and even sometimes new editors I am trying to pitch. We live in a world we’re so accustomed to getting thousands of emails and the only “real” mail we get these days, as adults, are bills. BOO.
Here are just a few reasons to send a simple handwritten note:
To say thank you
To say I’m thinking of you
To say get well
To say congrats
To let someone know some good news
To let someone know they are awesome – you never know when a positive note might hit their mailbox. In my experience, I get the best mail at the worst times – usually thanks to one of my best friends, Sarah. (Plus, she usually sends gummy bears or gummy worms or some variation of s’mores and that’s just awesome too.)
(If you recognize the name, Maya Brenner is also where I got my Texas gold necklace, that I never-ever take off.)
https://theblondeside.com/wp-content/uploads/2016/11/IMG_3408.jpg533800Jaymehttps://theblondeside.com//wp-content/uploads/2018/06/1526998321020-300x192.pngJayme2016-11-28 16:20:072016-11-29 16:34:35The Art of the Handwritten Note
It seems every couple years in life, I kind of redefine what I think (notice how I didn’t say what others think) gives me strength and confidence.
At one time it was actually being physically fit, working out, and having a strong body. I felt confident and strong and unstoppable.
At another point in my life, I felt that strength and confidence were very closely tied to my work, my job title, and my salary. If I was making enough money to live comfortably, I felt confident in what I was doing.
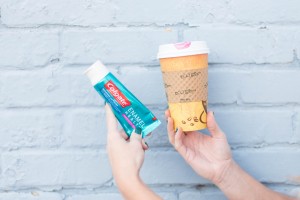
But one thing that has made me feel confident no matter what stage of my life I’m in has been my smile.
Sure it’s not a perfect smile, but it gives me strength and confidence. Maybe it was one of those smile quotes we’ve been hearing since we were kids (“A smile is the best makeup any girl can wear”), but a smile goes a long way.
And keeping my smile healthy and bright is why I’ve partnered with Colgate so I can continue to #SmilewithStrength, through all of life’s ups and downs and inconsistencies (because trust me, there are plenty).
Check out Smile with Strength for info, including some pretty rad workouts and tips.
*This post was part of The Blonde Side’s involvement as a Women’s Health Magazine Action Hero. This post was sponsored by Colgate, but the opinions represented are my own.
https://theblondeside.com/wp-content/uploads/2016/11/Smile-Quote-by-Marilyn-Monroe-1.jpg600800Jaymehttps://theblondeside.com//wp-content/uploads/2018/06/1526998321020-300x192.pngJayme2016-11-23 09:13:192016-12-21 10:47:38Smile with Strength
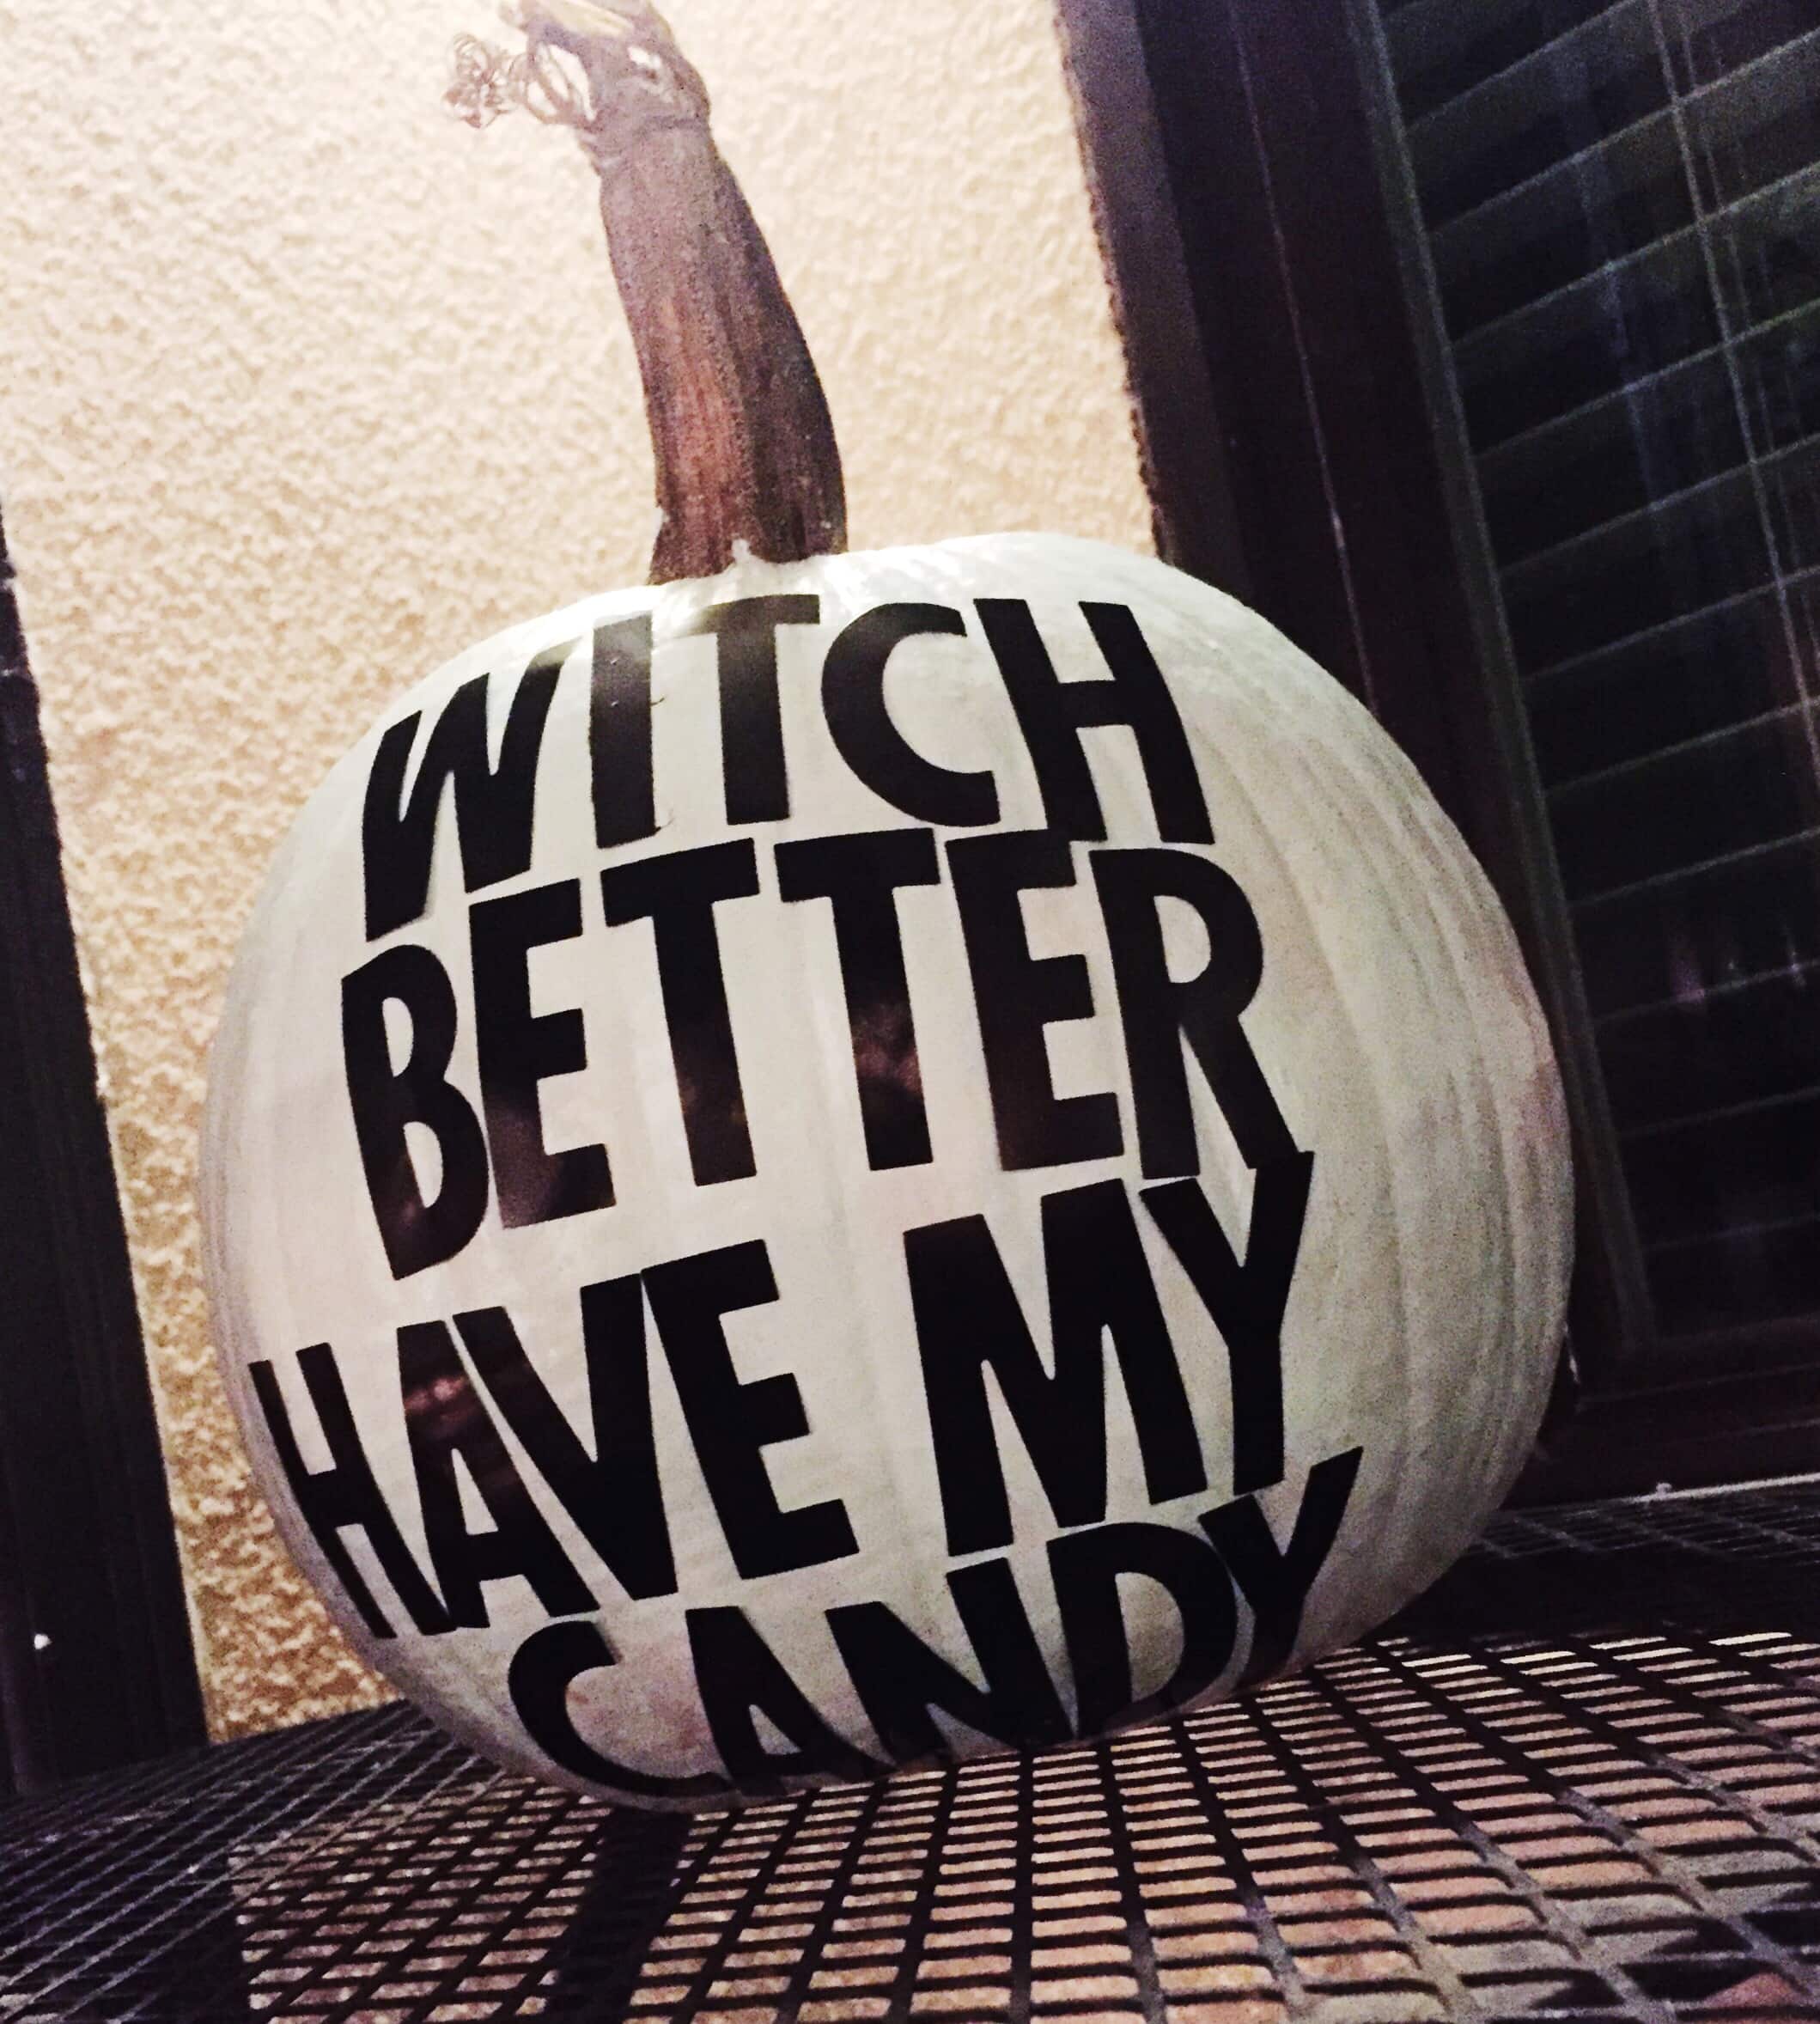
Photo by Jeff Mindell | Studio DIY (check their website for more great photos!)
I’m not sure when I got all into the whole DIY craze, but I have and it’s time to embrace it.
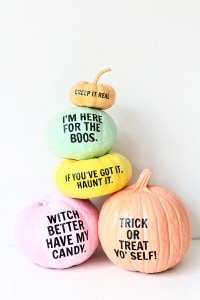
Recently, I ran across this DIY Pun-kins post from Studio DIY and I decided to give it a go for myself. (If you’ve never checked out Studio DIY, do yourself a favor and do it now.)
I invited my friend Braidee over and we drank wine and got our painting party on. Truth be told, I’m not very artsy but she definitely is.
Below are the instructions from Studio DIY and in italics are my changes to them:
1. Paint your pumpkins whatever color you’d like! I recommend doing a white “primer” layer first and then adding the color. I skipped this step, mostly because I’m not patient enough to wait for the primer to dry. In hindsight, I should have listened.
2. Download and print the puns (which are mirrored on purpose!) onto tattoo paper according to package instructions (all tattoo paper is different). I used black stick on letters, which worked surprisingly well. There probably is something I could have painted over them to make them stick better, but they worked pretty easily.
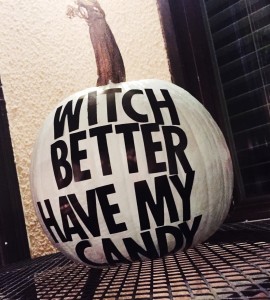
Here was my personal DIY crack at it…
3. You’ll follow all the same directions to apply the tattoo to the pumpkin, just as if you were applying it to your skin! For ours, once the ink dried, we had to press the clear adhesive sheet on top of the printable and then I cut each pun out separately. Skipped.
4. Have a wet rag/paper towel ready but DO NOT get the tattoo wet until it’s on the pumpkin. Peel the clear sheet off, leaving the adhesive behind and place the tattoo where desired and rub with the wet cloth for 10-15 seconds. Carefully peel the paper off, leaving your tattoo behind! For the larger puns or if you’re pumpkin is super round, you can work in sections or cut the words of the tattoo apart and do one at a time. Skipped.
Voila – to the right is my little creation – what do you think?
Part of my goal for moving into the Millennium Kirby was to have more friends over and host things that don’t necessarily require going out to a bar or spending a ton of money so fun DIY nights like this make it possible! [SPONSORED]
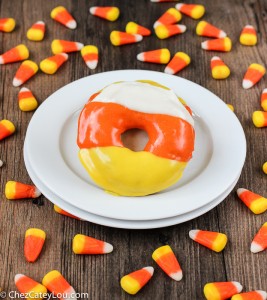
Here is the original link I found these Candy Corn Donuts at (click it and you’ll see a ton of helpful tips).
I love following Chez CateyLou’s recipes and her blog and recently fell in love with her Candy Corn Donuts (they are way easier to make than you’d think).
Ingredients For the Donuts
1 cup flour
3/4 teaspoon baking powder
1/4 teaspoon baking soda
1/4 teaspoon salt
dash nutmeg
2 tablespoons vegetable oil
1/4 cup sugar
1 egg
1/4 cup milk
1/4 cup yogurt
1 teaspoon vanilla
For the Glaze
1 1/2 cups powdered sugar
2 tablespoons butter, melted
2 tablespoons light corn syrup
2-3 tablespoons heavy cream
dash salt
orange food coloring
yellow food coloring
Instructions For the Donuts
Preheat oven to 325 degreesF. Grease two 6-cavity donut pans with nonstick cooking spray.
In a small bowl, whisk together the flour, baking powder, baking soda, salt, and nutmeg.
In a medium bowl, whisk together the oil, sugar, egg, milk, yogurt, and vanilla until very well combined.
Add the dry ingredients to the wet ingredients and mix until just combined.
Spoon the batter into the donut cavities, filling each one just over half full (this makes about 10 donuts). Bake the donuts for 8 – 10 minutes. Allow them to cool in the pan for a minute, then turn out onto a wire rack to cool completely.
For the Glaze
Whisk together powdered sugar, butter, cream, salt and 1 T heavy cream. Keep adding heavy cream until desired consistency is reached. Divide the glaze into three bowls. Keep one white, color one orange, and color one yellow.
Once the donuts are cooled, spread the icing on the donuts in three stripes – white on the top, orange in the middle, and yellow on the bottom. Allow the glaze to set, then serve.
Be sure to click on the links above for tips on perfecting this homemade donut recipe and to follow along with more of her great ideas for the holidays!
Ever since I moved into the Millennium Kirby I have had an even bigger craving to cook and bake more, and it’s super helpful that I live so close to multiple grocery stores. [SPONSORED]
Read The Blonde Side’s latest on Elite Daily, in the sports section.
The NFL season is upon us, and boy, does it mark a glorious time in our lives.
But along with your fantasy points and actual team wins comes dealing with the most annoying sports fans known to man. These fans are a necessary evil to the game we love so much.
Here are eight of the most annoying fans you’ll find at an NFL game (so don’t be this person):
1. The self-appointed section cheerleader.
You know the kind: the ones a few rows in front of you, who are more interested in turning around and demanding you stand up and cheer on every single play, instead of watching the actual game.
No matter how big of a fan you are, it isn’t really necessary to lose your voice from cheering every 30 seconds.
2. The guy who says girls don’t know sports.
Every real sports fan equipped with ovaries has fallen victim to this inaccurate assumption. And guess what? It’s old.
According to a recent study, 76 percent of females classify themselves as NFL fans, not to mention 46 percent of NFL merchandise is purchased by my fellow female fan base.
To be clear, it doesn’t matter how or why any of us girls became fans in the first place. We just are. And yes, it’s likely I know more about your favorite team than you do.
Click here for the full article and #’s 3-8 for most annoying sports fans at a game.
https://theblondeside.com/wp-content/uploads/2016/10/800x400-annoying-sports-fans.png400800Jaymehttps://theblondeside.com//wp-content/uploads/2018/06/1526998321020-300x192.pngJayme2016-10-12 16:59:262016-10-12 16:59:26The 8 Most Annoying Sports Fan
Change it up: 5 Ways to Breathe New Life into Your Running Routine:
Running is one of the most effective exercises for keeping fit, preparing for a competition or losing weight. However, no matter what your goal is, most runners hit a plateau at some point. Or they get injured, like I currently am.
Many people tend to lose steam and give up on their fitness goals once they hit a plateau, but with the right mindset and a few innovative ways to mix it up, you can break free of your plateau (I sound like an inspiring commercial right now, don’t I?)
One of the best motivations for keeping your running routine is changing the running routine. Here are a few things you could do to spruce up your daily run:
Run on a Trail
If you’re typically of the treadmill variety, running on a trail or other places with scenic views will boost your motivation. You get to run without restrictions. You can choose a new direction every day. This rids off of the boredom of having to run the same course on a daily basis. The people, trees, sunshine and other attractions you see along the way will take your attention from the fact that you are running. Therefore, making you run even further. Also, as you run, you can have goals of landmarks that you would like to see before ending your run. As you try this out, make the running more fun by listening to your favorite beats as you do this.
Go Uphill
This one’s tough, I’m not going to lie. This does not necessary mean that you have to find a hill to run on. If you have staircases that are free to run-on, this will do (I’m a big fan of semi-empty parking garages for this). Also, you can try add the inclines on your treadmill. Additionally, running on this type of surface is a great leg training and strengthening exercise. When running uphill, make sure that you run up to the top, then you can recover by walking or jogging your way down. Doing this several times prevents the monotony associated with regular running.
Try Speed Work/Intervals
Photo: Fabletics
Intervals are where it’s at. If you are accustomed to running easy, this could be the reason why you easily get bored. Feel free to mix intervals into your run. I know you are asking yourself if results will be achieved if you slow down, but I guarantee you that slowing down will not harm your exercise. Simply run at a slower pace than you normally do. Go for about 10 minutes, then run faster than you normally do for about the same amount of time. Alternate the slow run and sprint about 5 to 10 times. This will keep your mind focused on mini goals, rather than the run itself.
Change your look
So this is purely psychological, but you can change your daily run simply by trying a change in your look. You know that feeling you get when you first buy a new pair of running shoes and how excited you are to try them out? You can apply that mentality to your entire outfit. If you’re normally a black-on-black leggings and tank top person, maybe try a bright new color or mesh cutouts (like the fun stuff they have this month at Fabletics) to get excited about running outside. Sometimes all you need is a new perspective.
Incorporate Other Exercises
Adding other strengthening exercises to your running routine is also a great way to spice things up. Run for a while, then, instead of stopping to rest, do some basic exercises like sit-ups or lunges. These exercises take away the monotony or running and at the same time enhancing results for your exercise by challenging new muscles in the middle of your run.
https://theblondeside.com/wp-content/uploads/2016/10/fabletics-signature-dash-bra.png358449Jaymehttps://theblondeside.com//wp-content/uploads/2018/06/1526998321020-300x192.pngJayme2016-10-11 11:35:572016-10-11 11:35:57Change Up Your Running Routine
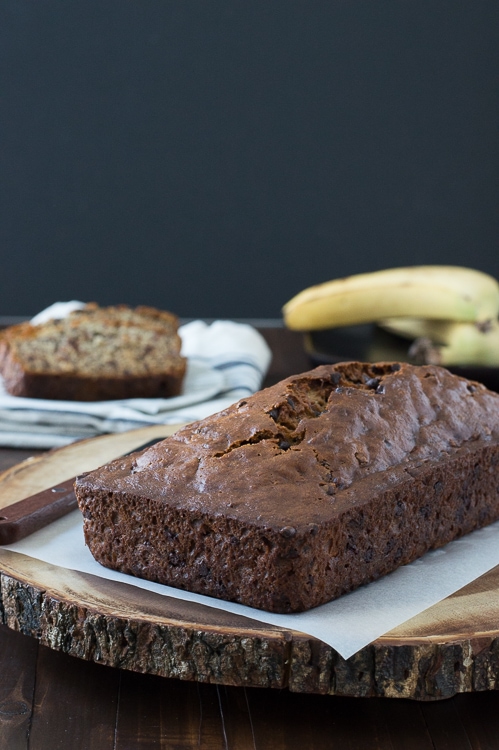
Here is the recipe from that blog (I encourage you to click the link above as she gives tips for making them into muffins and has a ton of other great recipes that I can’t wait to try!):
Ingredients:
3 ripe bananas, smashed (see below for tips using frozen bananas)
1/3 cup vegetable oil
1/2 cup sugar
1 egg
1 tsp vanilla
1 & 1/2 cups of flour
1 tsp baking soda
dash of salt
1/2 cup mini chocolate chips
Directions:
Preheat the oven to 350 degrees F and lightly spray a loaf pan with non-stick cooking spray.
Smash the bananas in a mixing bowl.
Add in the vegetable oil, stir with a spatula.
Mix in the sugar, egg, and vanilla. Stir to combine with a spatula.
Add in the flour, baking soda and salt, stir together with a spatula.
Lastly, mix in the chocolate chips.
Pour batter into the loaf pan and bake for 50-55 minutes or until a toothpick comes out clean.
Allow the bread to cool in the pan before slicing.
Oh, and lets talk about frozen bananas for a minute. My old roommate used to freeze bananas that were about to go bad. At one point in time we probably had 300 bananas in our freezer. In a super blonde moment, I tried to use one for some recipe and was so confused how a frozen banana could translate into a “ripe banana” as most recipes, like this one, call for.
So for those who don’t understand frozen bananas, it really was quite simple. I took the frozen banana (I had two “fresh” ones to use for this recipe) and set it in the sink for about 20-30 minutes (as it will ooze and be kind of icky), then I peeled it and added that to the fresh bananas, and voila.
Cooking and being more handy in the kitchen is all part of the “new me” living at the Millennium Kirby, and I’m lucky to be so close to multiple grocery stores to get all my baking needs in a jiffy. [SPONSORED]
Even though it doesn’t really feel like fall here in Houston, I’m still going to use the new season as an excuse to treat myself. It’s been a rough year, especially the last few months with my dad being sick (who is now on a miraculous road to a full-recovery after a 1-Million Dollar hospital bill!), so I don’t feel bad for embracing the treat yo-self mentality. I’ve earned it, and you probably have too.
With that in mind and since we are heading into the holidays very soon, I think it’s time to destress and reprioritize a few things.
7 ways (and ideas) to treat yo-self this fall:
Go for a hike. As the temperatures start to cool and leaves change colors, it’s time you became BFF’s with Mother Nature. Sadly, we don’t live in the beautiful Colorado Mountains, but there are still some beautiful Houston hikes (or just take a walk in an expensive neighborhood, which is one of my favorite depressing things to do!) worth taking. And guess what – hiking is usually free. Bonus for all us broke folks!
Find a good book and cozy up. Whether or not you want to cuddle up in bed or go sit outside in a comfy chair or hammock (!!), it’s time you get lost in a good book. If you’re in need of a good book, I highly suggest you try the Book of the Month Club. I started it two months ago and am obsessed. Plus, I think reading is just really, really good for your brain and your soul.
Get into football. Like really into football. During these fall
Get in the kitchen. Whether you’re the kind of person who wants to make spicy-chili during these chillier months or bake scary Rice Krispies treats, get in the kitchen. Even if you’re not an ace in the kitchen, it can be fun to unwind with a recipe, and even if it is a total #PinterestFail, you can always order pizza as a fall back. It’s a safe plan and one I’m not afraid to admit I’ve used a time or two. One of the reasons I love living in our new apartment at The Millennium Kirby is our massively huge (and open-space) kitchen. It has really helped me want to cook more. Speaking of Pinterest, follow me there.
Or make a cocktail. I won’t judge you if your idea of making
Go to the pumpkin patch or go apple picking. Clearly I’m a fan of being outdoors in these cooler months, but you really should spend this time wisely and treat yourself to something that can only be done in the fall months. I can pretty much promise that no matter how badly you want to carve a pumpkin in March, you’re going to be hard-pressed finding one. Not to mention, it’d be a fairly odd front porch decoration when it’s basically St. Patty’s Day, amiright? Full disclosure: I’ve never been apple picking before. It sounds kind of fun.
Invest in fall-scented candles. I have to admit I have an unhealthy obsession with candles, but they really are worth the money and can easily put you into a good mood. Besides, who doesn’t want a delicious-smelling home?
*Notice how I didn’t say anything involving Pumpkin Spice Lattes? Oh wait…I just did.
Being able to invest in myself (including the above “treat yo-self” mantra) is just one reason I love living at the Millennium Kirby, and it doesn’t hurt I am so close to so many great Houston things to do, like being able to walk around Rice Village. I am starting to love my adopted hometown more and more everyday. [SPONSORED]
https://theblondeside.com/wp-content/uploads/2016/10/shutterstock_398586523-1.jpg549800Jaymehttps://theblondeside.com//wp-content/uploads/2018/06/1526998321020-300x192.pngJayme2016-10-06 09:34:292016-10-05 15:10:097 Ways To Treat Yo-Self This Fall
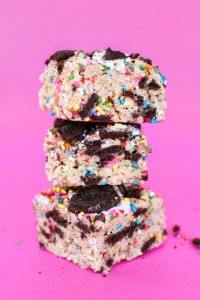
Funny how I consider myself well-versed in the kitchen these days (a whole lot more than I used to), but I had never made RICE KRISPIES TREATS until the other day. Every person I have ever known has made these at least once in their life, but not me.
Then I got a newsletter from Studio DIY with this picture and thought, it’s go-time.
Kelly at Studio DIY is just incredible and I love her newsletter. When she sent out this recipe (below) and I saw that it included Oreo’s, I was sold. I am obsessed with Oreo’s – almost as much as donuts.
¼ – ½ cup rainbow sprinkles (We went with “more is more” in ours but the sprinkle amount is really personal preference!)
DIRECTIONS
Melt marshmallows and butter in a large pot over low heat, stirring constantly till smooth.
Add Rice Krispies, Oreos, and sprinkles. Stir until everything is well coated in the marshmallow mixture.
Transfer to a buttered 13 x 9 inch baking dish. Using a buttered spatula or hands, press evenly into the dish. Cool for about 20 minutes. Cut into squares.
I did learn one thing while making these (other than the fact I have ZERO self control) – if you finely crush the Oreo’s, the Rice Krispies Treats will look more chocolate than pictured. They will still taste amazing, but if you want chunks of Oreo’s, be sure not to finely chop them.
Cooking and being more handy in the kitchen is all part of the “new me” living at the Millennium Kirby, and luckily I’m super close to multiple grocery stores to get all my baking needs in a jiffy. [SPONSORED]
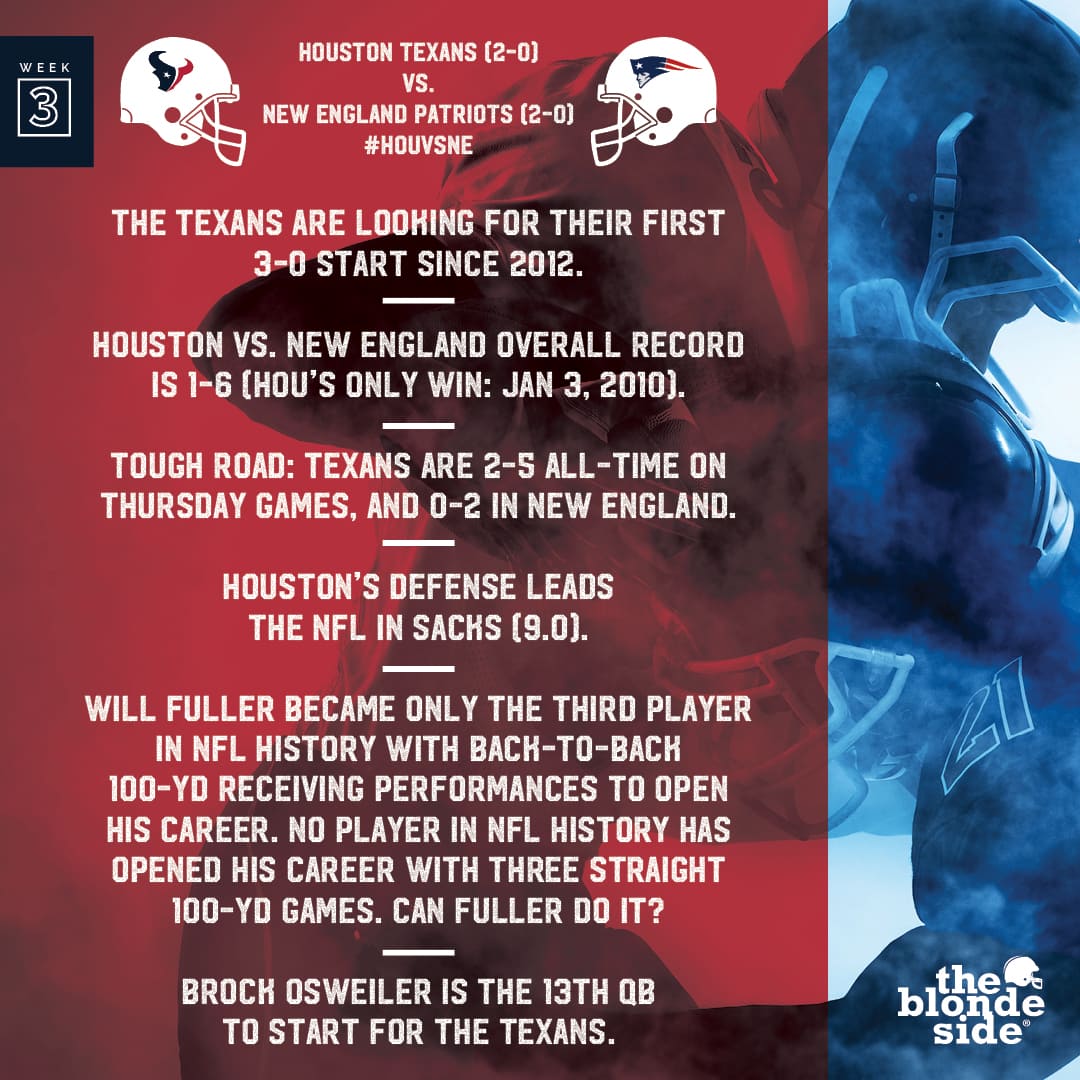
Week 3 is upon us and the Texans are heading to primetime (which usually doesn’t fair well for them) to take on the New England Patriots, sans-Brady.
Here are some of our favorite stats for this Week 3 matchup. (Although the Texans 2-5 record for Thursday games isn’t necessarily a favorite stat.)
I love living back inside the loop and so close to all the Texans excitement, which you can feel both at the Millennium Kirby and the Millennium High Street. [SPONSORED]


 It seems every couple years in life, I kind of redefine what I think (notice how I didn’t say what others think) gives me strength and confidence.
 was one of those smile quotes we’ve been hearing since we were kids (“A smile is the best makeup any girl can wear”), but a smile goes a long way.